This little piggy went to the party. This little piggy went to school. This little piggy was an afternoon snack at home. This little piggy went to gymnastics practice. And this little piggy went wee wee wee all the way in my tummy.
It’s the middle of winter and these piggies are cold! Make them blankets from scratch! Sure, you can buy prepackaged dough that pops out of a cardboard can, but then you’d be setting yourself up for all kinds of chemical additives and subpar ingredients. Besides, making the dough from scratch is easy and fun. My 11 year-old daughter can do it by herself. Kneading it is the best part. She gets all kung fu about it. You can, too.
Ingredients:
2 cups organic all-purpose flour
1/2 teaspoon baking powder
1 tablespoon sugar
1 teaspoon salt
1/2 cup organic safflower oil
1/2 cup hot water
30 mini beef franks
1 egg, beaten
sesame seeds
flax seeds
Preheat oven 375 degrees F. Mix together flour, baking powder, sugar and salt in a medium bowl. Add oil and water. Whisk together until fully incorporated and you see no powdered lumps left. Knead the dough well on a floured surface. Divide the dough in half and roll out the first lump until it’s thin and semi-rectangular. Using a knife or a pizza roller, cut out 15 triangles. Position a mini frank on the wider end of each triangle and roll the dough around the little piggy. Brush with egg and lay on a greased baking sheet. Repeat until there are 30 little piggies in a row. Sprinkle sesame seeds and flax seeds. Bake for 25 minutes or until pastry is golden brown.
Aloo Gobi is one of those dishes I’ve enjoyed in lunch buffets at Indian Restaurants, but don’t usually order as an entree for dinner. It’s unassuming and understated, not as much star power as the tandooris or the tikka masalas.
When it comes to home cooking, though, Aloo Gobi wins because I can make it in under an hour. Also, a quick glance down the list of ingredients reveals at least five ingredients that are known to be cancer-fighting immune boosting superfoods.
Extra Virgin Coconut Oil is blowing up all over the internet with lists upon lists of the many benefits and uses for it, from nutrition to personal care to first aid to household uses.
Garlic has been shown to lower risks for certain cancers, as well as supports the immune system. We turn to our recipe for Honey Lemon Garlic Tea every time we feel under the weather and need a boost.
Ginger fights cancer, relieves motion sickness and nausea, aids digestion, promotes healthy circulation, and many more. It is a major ingredient in Hulda Clark’s recipe for Kidney Cleanse.
Turmeric contains curcumin, which is more effective than many pharmaceuticals against several chronic and debilitating diseases including cancer, and has no side effects.
So here it is, my version of Aloo Gobi, the cancer-fighting, immune boosting superfood that can be made under an hour. I started out with this recipe and modified as I went along.
Aloo Gobi
Ingredients:
1 tablespoon extra virgin coconut oil
1 teaspoon cumin
1 teaspoon minced garlic
1 tablespoon minced ginger
1 onion, sliced
2 medium diced potatoes
1 teaspoon turmeric
1 teaspoon paprika
1 teaspoon garam masala
2 tablespoons plain yogurt
1/2 cup water
2 tablespoons coconut milk
1 head of cauliflower
Salt to taste
Rice
Cilantro
Heat oil in a medium skillet over medium heat. Saute cumin, garlic and ginger until the spices are infused in the oil. Spread onions across the skillet but do not stir. Let the edges of the onion caramelize. Stir in potatoes and cover to steam. Season with turmeric, paprika, and garam masala. Stir in yogurt, water and coconut milk. Cover and let it cook for about ten minutes.
While the potatoes are cooking, cut up the cauliflower into florets and stir into the stew. Cover and let it simmer for half an hour. Salt to taste. Serve on top of rice and garnish with cilantro.
Zinc Oxide is derived from the rare mineral zincite. It was mentioned as a skin treatment as far back as 500 BC in Ayurvedic texts, and in ancient Greek medical texts in the first century. It can be found as the active ingredient in skin products such as calamine lotion, diaper rash cream, anti-dandruff shampoos and antiseptic ointments.
Zinc oxide is approved by the FDA for use as a food additive. It has been listed as an ingredient in breakfast cereals as a source for zinc.
Hulda Clark mentioned using pure Zinc Oxide in her books as a food-grade replacement for commercial deodorant. She pioneered the concept that we should only use skin products that are safe enough to eat. After all, our skin absorbs whatever we apply on it through billions of pores all over our body. Toxic chemicals in body products find their way into the liver and other vital organs, wreaking havoc on our health.
When I was a new mom looking for a solution to diaper rash, I found that nearly all diaper rash creams list Zinc Oxide as its active ingredient, but the petroleum base it was in made me put that cream back on the shelf.
It seems counteractive to have a known allergen and skin irritant as the base of an ointment that’s supposed to treat a diaper rash.
So I went back to Hulda Clark‘s recommendation and used pure Zinc Oxide to treat my baby’s diaper rash. It worked overnight! It made me feel at ease knowing I was not exposing my developing child’s immune system to a cocktail of harsh chemicals, whose sole purpose seems to be to prolong shelf life.
Now that my daughter is grown, we still use Zinc Oxide to treat skin problems such as insect bites, pimples and all kinds of blemishes. When she caught chicken pox, Zinc Oxide kept her itch-free and under control.
Zinc Oxide, labeled as Deodorant Zinc Oxide at NaturalHealthSupply.com, comes as a pure white powder in a plastic cup. Just add water and shake to make a cream. It’s inexpensive and lasts a long time. The cream dries up after a while, but add a little bit of water, shake and it comes back to being a usable cream.
Try it and see what pure food-grade Zinc Oxide can do for your skin.
Sauerkraut is an Eastern European delicacy made of finely shredded cabbage fermented by lactic acid bacteria. It is an effective way to build probiotics, bacteria that is beneficial to the body’s digestive system. It is also rich in vitamins and minerals.
Like most healthy food items, industry has figured out a way to ruin a good thing. Canned store-bought sauerkraut is heat-treated to extend shelf-life, so it is missing the live bacteria cultures that raw sauerkraut has to offer.
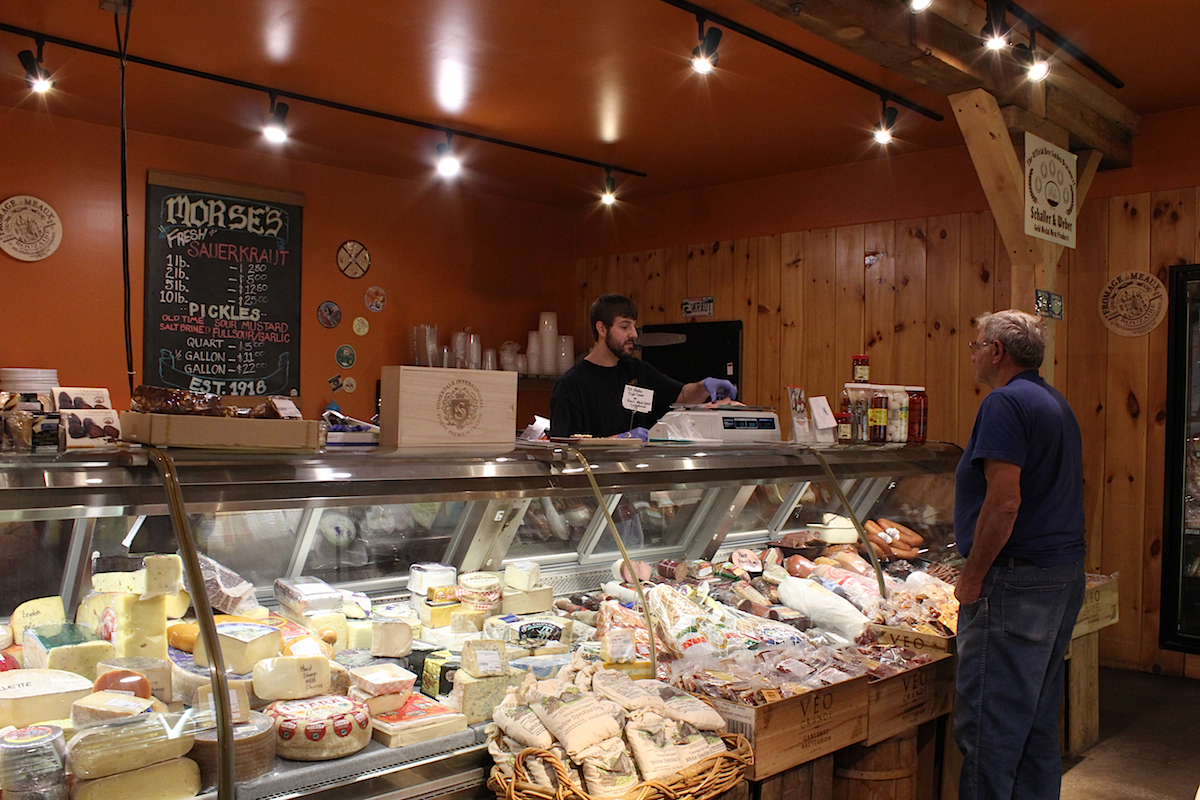
Cody LaMontagne, owner of Morse’s Sauerkraut
Seek out a local source for raw sauerkraut. We lucked out here in Maine because Morse’s Sauerkraut is the most awesome place to get “unadulterated lacto-fermented unpasteurized ‘kraut” since the day Virgil Morse delivered his first barrel of pickled cabbage to the local store in Waldoboro in 1910. Today, Morse’s Sauerkraut and Euro Deli also sells the best pickles, various cheeses, butters, fine meats, and many other European luxury foods.
Morse’s Sauerkraut serves amazing breakfasts and lunches in their restaurant, which gave us a chance to sample their pickles, sauerkraut and coleslaw on the side of their entrees. Everyone in the family loved it. Our bellies were happy!
I grew up eating duck eggs in the Philippines. The infamous balut is hardboiled fertilized duck egg, with a half-formed baby chick on one side and a bright yellow veiny yolk on the other. Begin by cracking the balut on one end to make a little hole, sprinkle some salt in there and suck on the soup. Then remove the rest of the shell, salt to taste and dig in. I’ve never eaten the chick part, but the yolk is rich and protein-packed goodness in a gulp. There is also a hard white “bone” in there. Don’t eat that.
Penoy is another duck egg delicacy. It is unfertilized duck eggs, not as gruesome as its counterpart. It is all yellow yolk the whole egg through. It comes either soupy or dry. The soupy kind was incubated in rice hay for 12 days. Incubated for more than 12 days and it dries out for those who prefer to eat the dry kind.
The duck eggs I received were unfertilized and not incubated. They were simple farm fresh duck eggs, and the first thing I did was hard boil some of them. Same as chicken eggs, I fill a small pot with water to cover the eggs, set the stove on high until the water reaches a rolling boil, then turn the burner off. I let the eggs sit in hot water for 15 minutes, then pour the water out and rinse the eggs in cold water.
Look at how much of the egg is yolk, and how rich and creamy it is. Duck eggs are bigger and more nutritious than chicken eggs. It has 52% more vitamin B12, 13% more selenium, 10% more iron, almost twice as much omega-3s than chicken eggs. The list goes on. Whatever nutrition chicken eggs have, duck eggs have more of it. And because there isn’t a huge duck egg industry, it is more likely that duck eggs come from humanely raised ducks that get to run around free at the farm.
Two winters ago, my then-9-year-old daughter asked her dad to help her in a big project. She had done electronics in the past, but this was the first time she came up with something to build it into. First they had to make the circuit. It’s a simple circuit, only meant to light up LEDs at the flick of a switch.
My daughter drew up a pattern for her plush toy, cut up the fabric and sewed it up on the sewing machine. (I taught her how to use the sewing machine when she was 8. Before that, she’d been hand-sewing since she was 4.) Before stuffing it and while the toy is still inside-out, she and her dad set the wiring up.
This spring, she wanted to make a companion for her plush owl. This time, building a circuit was a breeze, but using the soldering iron still needs parental supervision.
Using the sewing machine, however, has become almost second-nature to this budding designer. Like a pro, she drew up a pattern, cut up the fabric, sewed it up, and built her electronic wiring while the toy was still inside-out. Here it is all ready to stuff.
If I were to get stuck on an island with only one kind of fruit-bearing tree, I would hope and pray it was banana. Believe it or not, bananas are considered berries. In tropical countries like the Philippines, where I grew up, there are different kinds of bananas, varying in size, color, firmness and the thickness of its peel.
Latundan bananas are short, fat, very sweet and have thin peel. Lacatan bananas are the typical kind that can be bought in Western countries, longer, starchier, and with thicker peel than Latundan. Saba, also known as plantain, is big, bland, and better eaten cooked than raw. There is also the Señorita, which is very very small and very very sweet.
Growing up in the Philippines, bananas were a staple in my home. We don’t have as much variety in the US, but I try to always have some in my home here in Maine. It’s an easy to grab and go snack, and a nutritious dessert after meals. I throw one in the blender for all kinds of smoothies. Cut up in half with some peanut butter spread in between is all kinds of awesome.
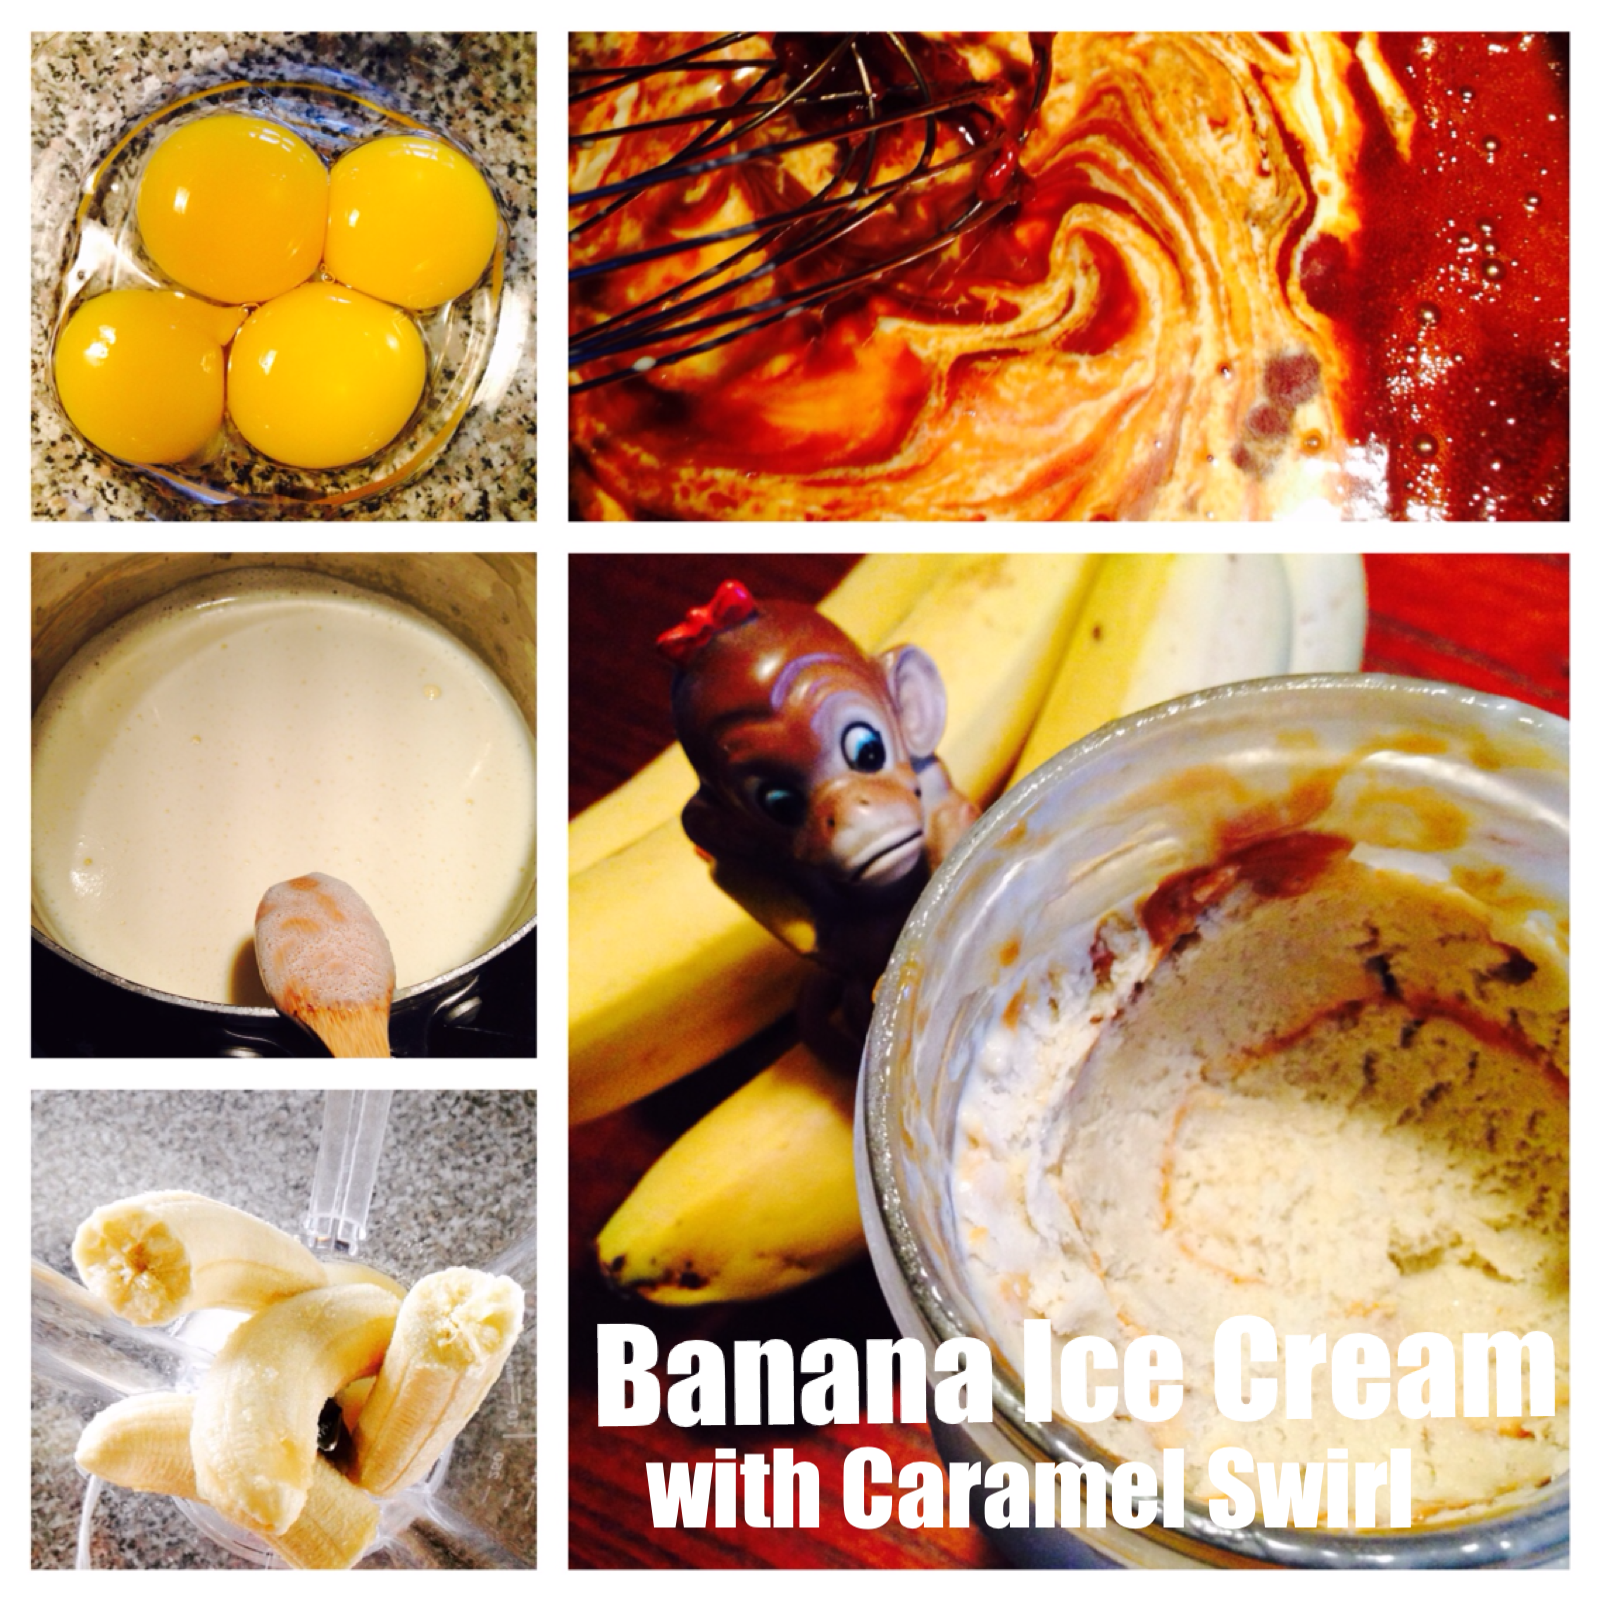
Although my favorite way to eat bananas is just by itself, my daughter recently requested it as an ice cream flavor. Here’s my recipe:
Banana Ice Cream with Caramel Swirl
Ingredients:
2 cups organic raw whole milk
1 cup organic raw heavy cream
4 large organic egg yolks (we had duck eggs, and they were fantastic!)
2/3 cup organic sugar
2 ripe organic bananas, chilled
1 tablespoon organic sugar
1/2 tablespoon freshly squeezed organic lemon juice
Caramel Ingredients:
1/2 cup organic sugar
1 cup organic raw heavy cream
Directions:
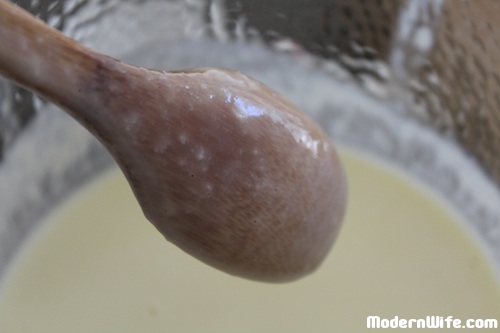
Combine milk and cream in a medium saucepan over medium-low heat. Stir occasionally so a film doesn’t form on the surface, until tiny bubbles show up on the edges and the mixture reaches 170 degrees Fahrenheit.
Once the milk/cream mixture reaches temperature, slowly pour a little bit at a time into the bowl of egg yolks while whisking continuously. Don’t hurry this. You don’t want to cook your eggs into some kind of scrambled thing. Slowly but surely, you want custard. Return the whole mixture to the saucepan and cook over low heat, stirring frequently with a wooden spoon until the custard thickens and coats the back of the spoon. It should reach a temperature of 185 degrees Fahrenheit without ever going to a boil. This will take a long time. Patience is the key. Pour the whole mixture through a fine mesh strainer into a clean glass bowl and let it cool to room temperature. Stir it often to let the heat out. Once completely cooled, cover and refrigerate overnight. Chill the bananas in the refrigerator as well.
Blend bananas, 1 tablespoon sugar, lemon juice, and half the custard. Blend until smooth then whisk back into the rest of the custard. Pour the whole mixture into a prepared ice cream maker. Churn until thickened.
Melting #sugar A photo posted by Modern Wife (@modernwife) on
While churning, cook 1/2 cup sugar in a medium skillet over medium heat. Stir with a wooden spoon once sugar begins to melt.
Once the sugar is completely melted and turned a reddish-brown color, lower heat to medium-low and add 1/2 cup of heavy cream. The mixture will bubble vigorously, so keep a distance from the pan immediately after pouring. Whisk and add the remaining 1/2 cup of cream.
Keep whisking and cooking until the sauce thickens but is still pourable, about 10 minutes. Cool completely, then refrigerate. It will harden in the refrigerator. Bring to room temperature before using as a topping.
When the ice cream has churned into a soft serve consistency and just before it overflows out of the ice cream maker, turn the machine off. Transfer a little bit at a time into an airtight container, alternating with spoonfuls of caramel. Freeze until firm.
It’s springtime and berries are back in season. Sure, you can find berries in the grocery store almost any time of the year, but more often than not, they look a little sad and travel-worn.
I’m talking about berries you can find at your local farmers market, the kind more than likely grown just within a few miles from where you live. Yes, the kind that is bursting with nutritious ripeness because they were harvested the morning you bought it. (See Superfoods: 11 Berries to Improve Your Health.)
Now I could probably eat a whole pint of any of these berries in one sitting, just popping each one in my mouth like popcorn. But for a heavier breakfast or dessert, I like to put it on top of a bowl of raw organic yogurt.
Raw organic yogurt is dairy that is fermented with beneficial bacteria, for a healthy digestive system. (See 10 Proven Probiotic Yogurt Benefits & Nutrition Facts.) My local health food store stocks them from a local organic dairy farm. They come in flavors such as maple, vanilla and blueberry, but I’m a stickler for keeping it simple. I get plain for its versatility.
Raw organic yogurt is not the same as the mass-produced yogurt you can buy in the grocery stores, which is over-processed through pasteurization, killing all the beneficial bacteria naturally occurring in raw milk. Then they add back a starter culture of live bacteria, thickeners, preservatives, and artificial sweeteners. It is nowhere near the creamy goodness I get in a mason jar from my local organic dairy farm. Believe me, it’s really worth it to find a local source for raw organic yogurt, and when you do…
Scoop out some of that raw organic yogurt into a bowl, drizzle maple syrup to taste, and sprinkle your favorite berries on top. You’re welcome.
Bees are in danger. All over the world bees are dying. Pesticides and the loss of adequate habitat devoted to bees are killing bee colonies. Governments are not acting fast enough to make the changes necessary to save them.
We, you and I, need to do something about it. It’s really easy to provide a honey bee haven. All bees need is pesticide-free food, shelter and water. Your garden, balcony or front porch will do.
Stop using pesticides in your garden. Explore organic ways to control pests such as ladybugs.
Plant flowers bees would love throughout the year, especially in the late summer and fall.
Set up a clean source of water, like a shallow fountain or rainwater collection system. Bees don’t need much.
Leave some ground undisturbed with dead branches for wild bees to find shelter in.
These are the recommendations made by Honey Bee Haven. It’s a small contribution that can make a big difference.
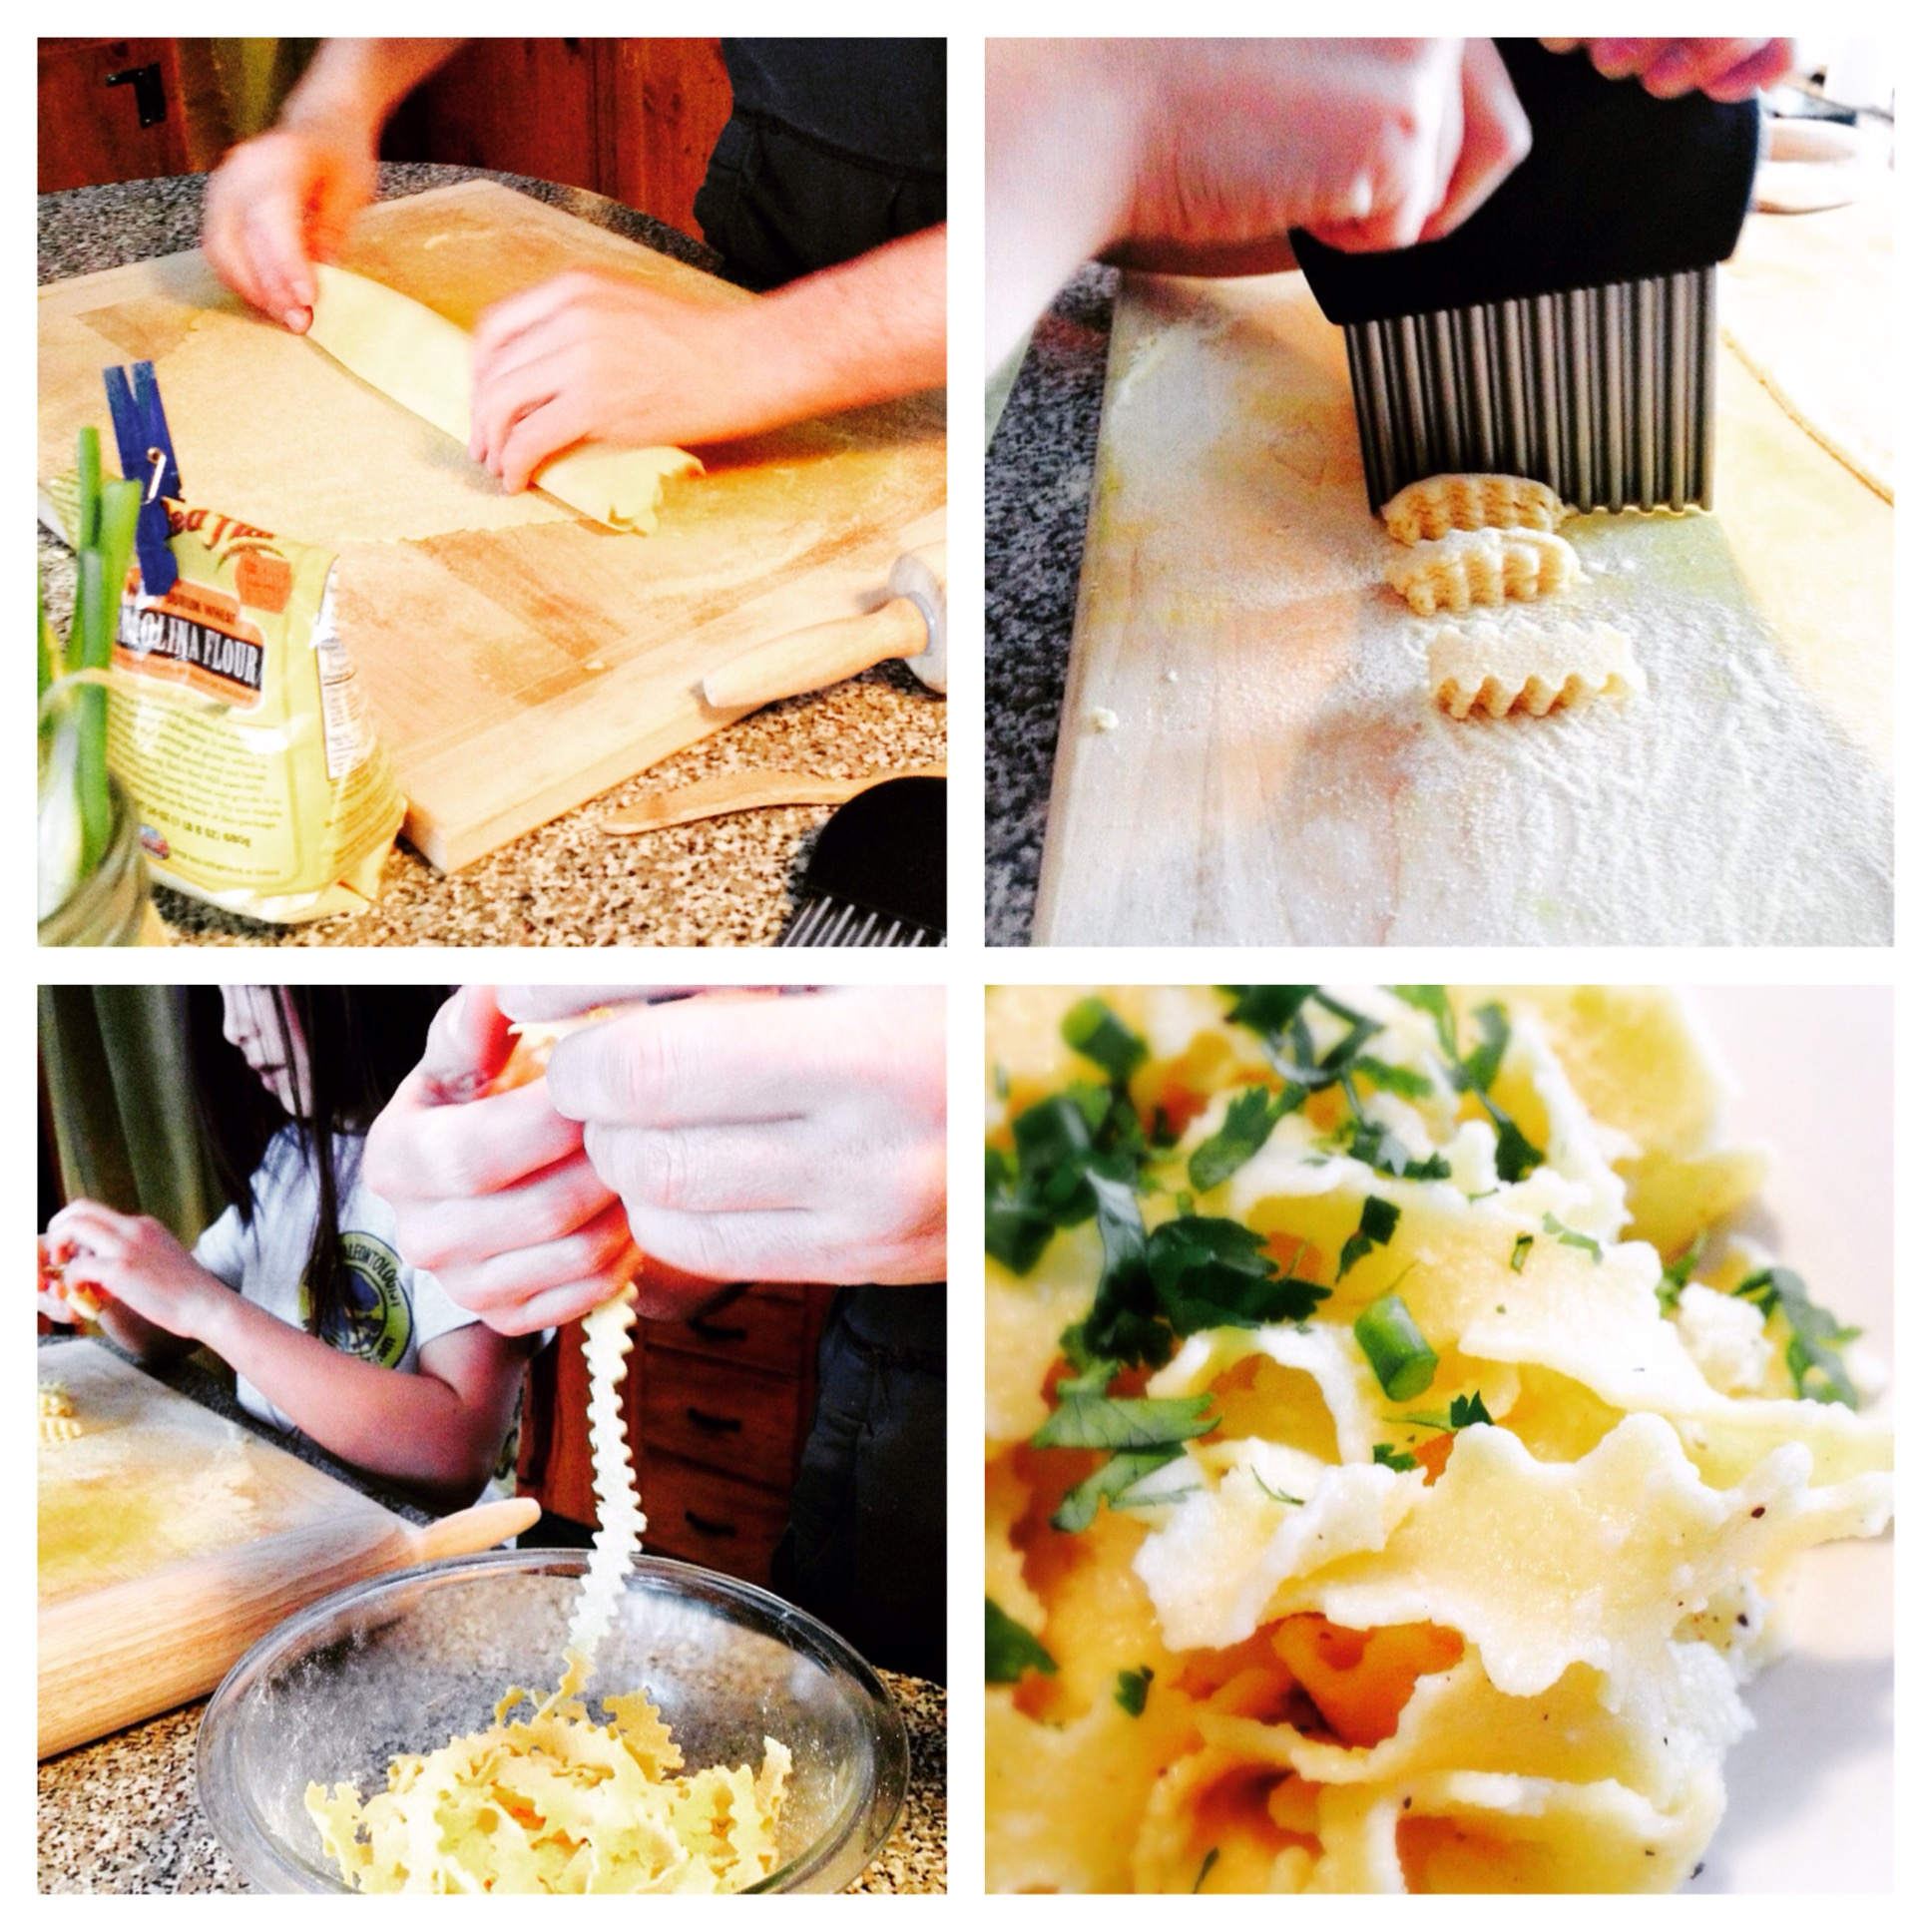
My daughter has been making homemade pasta with her Dad for as long as she remembers. Preparing meals is a family activity in our home. It’s so gratifying to see my 10-year-old daughter competently handling knives and the stove, while conversing about our family’s health philosophy (in between silly stuff).
We stopped eating wheat for a few years, but the complexity of blended flours trying to capture the texture and taste of wheat seemed more of a process than simply committing to using organic or non-GMO wheat flour products.
We still enjoy coconut flour for making coconut muffins, arrowroot flour for making dry arrowroot cookies, rice flour for making rice cakes. But when it comes to making bread and pasta, there is nothing like good old wheat.
Homemade Pasta
Ingredients:
1 cup semolina flour
1/2 teaspoon salt, optional
2 eggs or 3 egg whites, free-range and organic
Combine semolina flour and salt. Add beaten eggs. Mix to make a stiff dough. On a lightly floured surface, flatten dough with a rolling pin. Jelly-roll the flattened dough and cut into noodles.


 Return the whole mixture to the saucepan and cook over low heat, stirring frequently with a wooden spoon until the custard thickens and coats the back of the spoon. It should reach a temperature of 185 degrees Fahrenheit without ever going to a boil. This will take a long time. Patience is the key. Pour the whole mixture through a fine mesh strainer into a clean glass bowl and let it cool to room temperature. Stir it often to let the heat out. Once completely cooled, cover and refrigerate overnight. Chill the bananas in the refrigerator as well.